The
Australian
Nordic Ski Instructor
Manual
Ski Techniques
Freestyle techniques
Techniques: [ overview | basic | classic | basic XCD | inter XCD | freestyle | adv XCD | survival]

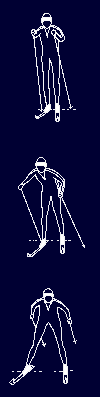
Free skating
Definition
Skating without the extra thrust derived from pole-planting, but either with or without an arm-swing. This technique is used in very fast conditions when the extra thrust of the poles is not required, or when wishing to maintain balance, such as when skating down steep hills. In a tuck, the arms and elbows are normally braced against the poles and thighs.
Teaching terrain
Slight to moderate downhill on firm, even, but not icy snow.
Teaching approaches
- Warming up for skating is important (as it is with all techniques!), and muscle groups must be ready for the extra exertion required to skate, rather than diagonal stride. A good warm-up game of football or tag acts as an introduction to skating, because skier's invariably skate to get about during the game.
- Both games should be played without poles - use them to define the boundaries - and for safety's sake, without metal-edged skis. Football can be played as handball, or with a frisbee, or hat, etc. Do not let the game go for too long, though, as energy must be conserved for the exercise at hand - unless they all take to skating around in the game like experts in five minutes.
- Skating is not too dissimilar to diagonal striding, except that the pushing ski doesn't remain parallel to the gliding ski. Since it is difficult to obtain grip for diagonal stride using skis suitable for skating, it is not worth reviewing diagonal striding on skis - but if the students remove their skis, a great deal can be reviewed.
- Whilst standing on a firm patch of snow, demonstrate diagonal stride (without skis) and show which is the pushing leg and which is the gliding leg - it is useful to know the difference. Get the whole class to practise diagonal stride up and down their own patches of firm snow. Sliding or shuffling the front foot, rather than lifting it, will be a more accurate representation of the real thing.
- Still without skis or poles attached, stand still, with the feet about 50 centimetres apart and pointing outwards (divergent), duck-fashion. The next exercise highlights the feeling of weight-transfer from one foot to the other, without which skating is at best clumsy and awkward. Lift one foot slightly off the snow and feel the pressure exerted through the other foot. Now rock back onto the lifted foot until it is firmly on the ground, and as pressure is applied, lift the now-weightless foot. Continue this with a faster and faster tempo until the rocking becomes automatic. What happens when the legs are kept as straight (stiff) as possible? What happens when the legs are allowed to act as shock-absorbers and flex a little?
- To improve this still further, and to improve the awareness of the action, encourage each student to jump as far to the right as possible, and then jump back as far as possible to the left, without moving forwards at all. Is the task made easier with stiff legs, or flexed legs? It should be obvious that a flexed leg will allow a longer and more powerful jump. At this point get the students to slide the jumping (gliding) leg across the snow with a little pressure, rather than jumping it across.
- Standing tall at the end of the gliding movement will increase the power and reduce the effort of each skate. It also gives a chance for the skiers to stretch their back muscles, too.
- The pushing leg (the one that doesn't move until the gliding leg has moved away) can be focussed on now. Show how by applying a little edge to the foot just prior to jumping away, it is possible to maintain grip. Is the 'pushing off' done by the ball of the foot, or by the big toe, or somewhere else?
- Make sure that the tempo is maintained throughout the previous exercises, and vary it from fast to slow and back again. Use music, or generate your own, and get the students to stand in a line (front-to-back, not side-to-side) and form a snake (samba) by placing their shoulders on the skier in front, skating from side-to-side whilst moving forwards. What happens when they are told to stiffen their legs? What happens when they crouch down low? How does a change in tempo affect their jumping distance?
- Skating comes from the hips as much as from the legs. Good 'pelvic thrusts' are mandatory for powerful skating. Repeat the above exercises (still without skis!) and focus on the hips. They should lead the leg's move sideways, with the knee slightly in front (to maintain a flexed leg), and the foot directly below the hip, and not in front of the hips or foot except in steep uphill climbing. This will ensure that the weight-transfer onto the gliding ski is complete. If the hip sits back, weight-transfer is at best only partial, and out of time with the pushing foot thrust. Students who prefer to crouch in the manner of a speed skater will tire quickly whereas those who prefer to remain bolt-upright will not develop any power.
- Up until this point, skis have not been required. However, if the students are going to learn ski-skating, it is time to put the skis on again. Repeat as many of the above exercises as required, and allow the students plenty of time to practise each aspect of the technique.
- One aspect that cannot be covered without skis on is that of the recovery of the pushing foot once it has done its job and is brought back to become the new gliding foot. If the weight-transfer is weak (i.e. the skier prefers to remain balanced on both skis at any one time, rather than just the gliding ski) then the power of each skate will gradually diminish, at the same rate as the increase in the foot separation of the skier's feet. Encourage an ankle-to-ankle touch between each skate, which will not only allow for a longer glide, but also a slight pause will be introduced as the skier balances on one foot. The ankle-to-ankle touch should come with a flexed leg, not straight, otherwise the exercise will have limited value. Note also that the recovery foot will work better if the toe is pointed upwards into the top of the boot, whilst pushing the heel downwards. This helps to control the ski tip and prepare the ski for the next skate.
- Now that the lower body is working well, it is time to work on the upper body, particularly the hands and torso. In general, the torso will follow the gliding ski, and face in that direction. However, in very short skating strides (high tempo), the path travelled by the skier 's torso will be in a straight line down the track, and in this instance the skier's torso should face in that direction. As the tempo slows down and the track length of each skate is increased, the torso should begin to orientate towards the gliding ski direction of travel, rotating only when the pushing ski is brought forward ready to act as the new gliding ski.
- Arm action is as natural as it is when walking, except that it appears that some skiers do not normally walk 'naturally'. As with diagonal striding, the left arm is best placed forwards as the skier glides on the right ski, swinging it back as the other arm comes forward to coincide with the other foot also coming forwards. If the students become confused, remove their skis and turn them into elephants, repeating the previous off-ski exercises with a healthy amount of 'trunk-swinging', getting them to use their arms as (two) elephant trunks. Lazy, floppy, skiers will get it right first time. The thinking skiers will have as much difficulty doing this as they will have walking normally whilst thinking about how to walk. Switch off as many of their brain-cells as you can with distractions and games, and success is assured.
- If the last exercise is still unsuccessful, revert back onto skis and ski in partnership with the 'troublesome' student. Get thim/her to imitate your actions and skate directly behind you, whilst you swing your arms normally. If this still won't work, grab some very long poles and get the student to wear the poles in the normal fashion, with you standing directly behind and holding the pole tips. Skate along and direct the student's hands via the poles - in this way you can also affect the direction of the swing, and the timing.
- In a given length of track, find out how many skates are required to get from one end to the other. Each student will have a different number of skates. Reduce this personal number by one for everyone, and try again. Repeat as many times as desirable. How is the tempo affected? Now try the opposite, by using that initial personal number and doubling it, then announcing that the students must come as close as they can to this new number in the given length of track (bribery and prizes optional).
Notes
Free skating is the foundation of all skating manœuvres and it is important that the students can perform this technique with some competency prior to trying the more complex skate techniques.
Non-wax skis are a handicap when attempting to learn any skating technique, especially on softer snow. Understand the limitations of these skis, and adjust your teaching pattern to suit. Encourage your students (after the lesson!) to get waxable skis if they wish to develop their skating skills beyond a rudimentary level.
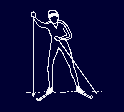
Diagonal skating
Definition
This is skating with a single pole-push to each side, diagonally opposite each foot thrust, in a similar manner to herringbone climbing, but with a skate and glide instead of a step. Used mostly when climbing steep hills, or when tired.
Teaching terrain
Initially flat, then slight to moderate uphill, on firm but not icy snow.
Teaching approaches
- A review of herringboning technique and free skating does no harm, followed by removal of the skis (not poles). Practise herringboning, and then encourage a skating action onto each foot (gliding foot), rather than a step. Use the poles as you would for herringbone climbing.
- With the skis back in place, the arm action of free skating is repeated, this time with the pole plant as well. Some students are confused as to which arm should be providing the push, and if any seeds of doubt are sown early, things only get worse as you try to explain and demonstrate. The solution is to increase the tempo, and the gradient, as much as possible to therefore dictate which arm is used when (as the going gets tougher, only the 'best' action will work with any degree of success).
- The best arm action is that of the left arm providing the push as the right foot pushes (hence diagonal skating). There should be no need to define it further, and if the students still insist on pushing off the other ski instead, the technique is no longer diagonal. End of story!
- Pole action is all-important here, and the point at which the pole tip is placed in the snow, in relation to the skier, affects the amount of push the skier is able to exert. In slow-tempo diagonal skating, the glide path will usually be quite long, and the poles should be placed so that the force can be directed along the line of the gliding ski. However, in fast-tempo diagonal skating, the glide path is relatively short and the general direction of travel will be more the direction of the torso at all times, unlike the zigzag torso path in slow-tempo skating, thus the poles should be aligned in the direction of general travel down the track. In either instance, the poles should remain parallel to each other, when looking from behind the torso.
Notes
The body action for diagonal skating is identical in almost every respect to that in free skating. Arm action is similar, but obviously follows more the arm action in diagonal striding. Longer poles make this action smoother by allowing the skier to place the pole tip further behind and out of the way of the skis. If students have standard Nordic poles, this technique will be less powerful.
Half skating
Definition
With one ski continually gliding in a set track, the other, pushing ski is placed out in a divergent position and pushed against until it has to be brought back closer to the body, and repeated again. A double-poling action with the poles coincides with this push.
Teaching terrain
Preferably set track or tracks, running slightly downhill, with room for the skating ski to push off without hitting softer unpacked snow at the edge of the track.
Teaching approaches
- Get the class to leave one ski behind (either one - but for the sake of clarity make them all remove the same-sided ski!). This skating technique can be 'dry-run' just like all of the others, with subtle variations. Refer to the foot with ski attached as the gliding ski, and the other foot as the pushing ski, even though no ski is attached. Sit the gliding ski in a straight track, and ask the students to propel themselves along in whatever fashion they can (don't worry if they won't push to the side - this is dealt with later). The pushing ski (foot) will, if the snow on the side of the track is firm, naturally only come into contact with the ground for a brief period, thus encouraging long glides on the gliding ski. Without questioning the way in which they use their 'pushing ski', ask them to decrease the number of pushes but increase the distance travelled.
- From the above exercise, vary the way in which the skier stands on the gliding ski (from bolt upright to crouched low) to see which works best. Where do the hips sit when varying this balance? Try the 'pelvic thrust' exercise of the previous technique. What does this achieve?
- Still with only one ski on (swap sides if it is getting tiring), focus attention on the pushing ski (foot). For many, the foot will work best with the toe digging in deeply just as the push takes place - few will bother to angle the foot out sideways to replicate a skating movement. However, for those who have yet to alter their foot stance to that of a skate, it is imperative that they try, else when the other ski is replaced grip will be non-existent on the pushing foot.
- After a little practice of pushing with the side of the foot, focus more closely on the part of the foot that does the work. A longer stride can be obtained if the skier brings her/his pushing ski foot a little in front of the gliding ski foot (and landing on what part of his/her foot?). The push takes place, with the final phase of the push taking place as the rearward pushing foot loses its ability to push any more, because the body has moved on too far from it. Where is the pressure felt at this stage? That 'roll' of the foot from the little toe and outer edge to the big toe and inner edge is instrumental in achieving a smooth push off.
- Now with both skis on, replicate the same exercise, working on the foot placement of the pushing ski. Touching the heels together helps here. Contrast that to letting the feet stray further and further apart between pushes. It is inevitable that the pushing ski will overlap the tail of the gliding ski. This is quite normal, and does not affect the speed of the gliding ski if the gliding ski is able to sit in a reasonably deep track.
- What happens when the angle of the pushing ski is altered? What happens to the tempo that is able to be maintained? Obviously, at slower speeds a wider angle of attack is possible, but at a higher speeds a wide angle will only cause the skier to lose balance and trip over him/herself. It is hard to accelerate and build up speed (no power) from a narrow angle.
- If the legs are sorted out, now is the time to review double-poling, as this technique is part of effective half-skating. Ensure that the poles and upper torso are in fact used to provide power (the back should come close to horizontal for maximum effect) before attempting to combine this with the half-skating technique learned so far.
- Combine double-poling and half-skating simply by encouraging a three-point landing of pushing ski, left, and right poles, with the shoulders initially facing down the track and thus guiding the poles in the same direction.
- As power and balance are increased, begin to encourage a slightly different method of pole usage: as the arms swing forward, swing them along the line of the pushing ski, thus rotating the upper body to face in that direction also. As the arms swing back, gradually rotate the body back to face along the line of the gliding ski. This rotation should begin as the arms swing past the hips, and helps the pushing leg to get a good edge prior to pushing off.
- The timing of the pole-planting will determine how effective the push from the poles is when combined with that from the pushing ski. Leaving it too late will stagger the pushes and reduce their effectiveness, as will planting the poles too early - experiment and see for yourself.
Notes
Make certain that the track used is well set if this is to work properly. The track should also offer slight resistance to the gliding ski to allow the students to feel the acceleration that is achievable through good technique. A downhill track, although alluringly easy to begin with, becomes annoyingly fast and skating becomes difficult when the skier picks up speed.
The aim is to propel oneself in the direction of the gliding ski, but with a very powerful push from the pushing ski it becomes more difficult to maintain the direction. Increase the tempo or use a steeper gradient, or learn to jump in and out of the track. This technique does not rely on made tracks to be performed well - it is equally possible to half-skate on any pisted (hard-packed) snow.
Two skating
Definition
Two skating motions with the feet combined with a single double-poling push equally from both poles (and at the same time) on every other skate. This is a useful technique to use when a relaxed motion is required, and is thus suitable for beginner skaters. When used effectively, this technique provides incredible gliding distances.
Teaching terrain
Long slight slope, on firm but not icy snow.

Teaching approaches
- A review of free skating should precede this lesson, with emphasis on a good glide between each push off. The arm action is not important at this stage. Part two of the revision exercise is to ensure that double-poling is powerful, without which students will not be able to develop effective two skating.
- If you are satisfied that the students can free skate and double pole comfortably, revert back to the following exercise without skis or poles: introduce the concept of double-poling without actually using poles, and practise swinging the arms forward and back in a smooth cyclical fashion.
- From this exercise encourage a rotary motion of the arms around an imaginary hula-hoop held vertically in front of the skier. If the students are unfamiliar with hula-hoops, then get them to swing their arms around a large imaginary clock-face (non-digital, of course) held in front of them, whilst performing the double-poling action at the same time. It begins to look a little like a Muslim prayer meeting if they have got it right (facing Mecca might help...).
- Combine with the cyclical arm-swinging a motion by the feet, rocking from one foot to the other in time with the revolutions around the clock-face. If the student is going clockwise (they usually do!), then encourage a right foot 'stomp' as the arms come down towards the feet - this is a 'three-point landing' of the imaginary gliding ski and the imaginary poles.
- As the 'stomping' (right) foot hits the ground, the imaginary pole-tips should do the same. To complete this exercise, the left foot needs to come into play also, and this is done by lifting it slightly into the air as the right foot hits the ground (remember that all of the students must be moving their arms in a clock-wise direction!).
- The left foot then comes back down onto terra firma as the arms swing past the bottom of the cycle and begin to swing upwards (on the left-hand side of the torso). When the left foot hits the ground, it is time for the right foot to lift, so that only one foot is on the ground at any one time. This whole exercise is best done by imitation, and not description, otherwise too many brain cells become activated and a melt-down may occur!
- Back onto skis again but without poles, go over the skating action once more, identifying clearly the gliding ski versus the pushing ski. Get the class to practise skating whilst swinging their arms in the same way as when their skis were removed, so that the swinging becomes natural. Once this is satisfactory, the addition of poles should see all of the students two-skating with ease.
- Doubtless the poling action will need attention, as will the placement of the poles. The torso should be used in the same manner as good double-poling, but with slightly less of a body lean (45° is usually enough) when poling through. Faster tempos demand less body lean to maintain balance.
- In two skating, the torso faces along the gliding ski, and the arms swing past the hips and along the line of the gliding ski as soon as it hits the ground. When the glide is practically over, and the gliding ski is about to become the pushing ski, the torso swings to face the new gliding ski, and the poles are planted so that the skier may push through and in the direction of the new gliding ski.
- The double-pole push takes place evenly with both arms until the new gliding ski is well on its way, at which point the arms should be extended out behind as far as they can be. If the body is to recover quickly and smoothly from the extra push gained from the poles, the end of the push by the poles will coincide with the end of the push with the pushing ski. The recovery of the arms back to the front of the torso takes place as the skier prepares to use the now-gliding ski as the new pushing ski.
- Encourage an even push of the legs on both sides, and not just a weak recovery on the non-poling side if the skate is to be most effective, or powerful. Do not forget to try the 'anti-clockwise' direction too, so that the skier is able to push with the poles on whichever side is best for the terrain, etc. For example, a push by the poles to the left at the end of the push phase may assist in gradually turning the skier around a left turn in the track, or compensate for a prevailing wind running from the left to the right.
Notes
This technique works the arms half as hard as the legs - they get a complete swing from front to back and return (one double-poling cycle) in the time that each leg has had a chance to be the pushing ski (two skates, hence the term two skating). At very slow skating speeds, this is more restful than other poling variations. At high speeds, it is also restful (easier to perform), but requires greater balance for that greater glide.
Notice that the poles are used to push firstly in one direction and then in another, all whilst in one poling action. This can be confusing for some, until it is seen more clearly. The poles are placed in a position to push the skier along the line of the initially gliding ski. As the push from the poles takes place (halfway through) they then push along the line of the new gliding ski - the new direction of travel.
Offset skating (a variant within the two-skating family)
Definition
This is two skating with an offset pole-plant (offset from each other) on one side only, helpful in maintaining an even momentum whilst climbing hills, and on flat snow when the going is slow.
Teaching terrain
Slight to moderate uphill, on firm but not icy snow.
Teaching approaches
- All of the exercises used for two skating can be used here, since the techniques are almost identical.
- The distinction between the 'hanging' arm, and the 'pushing' arm, needs to be understood, as this is how offset skating differs from two skating. In two skating, both arms are used equally to provide a push, whereas in offset skating the hanging arm pushes from a higher position than the pushing arm.
- Which arm is which? Going back to the clockwise rotation exercise, let the left hand drop lower and across the chest somewhat - it is now the pushing arm - whilst the right hand can reach forward and a little higher than normal - this arm becomes the hanging arm. Notice that when completing the cycle that the pushing arm pushes first, followed later by the hanging arm.
- The poles still act in the same way (i.e. still in time with the 'three-point landing') as for two skating, but the power exerted through the poles is more gradual, and is thus beneficial when climbing hills and the tempo reduced (jerkiness is lessened). The pushing arm, because it is somewhat lower and closer to the body, is pulled out and away from the body, rather than alongside the hips, whereas the hanging arm, because it is out in front (and thus sometimes called the leading hand) is held more tightly in towards the forearm - especially if using longer, skating poles. Both poles finish propulsion at the same time.
- If climbing a slope, the tempo will have to be increased to be effective. Practise increasing the tempo as well as changing directions (swapping pushing and hanging arms). As the slope increases, the recovery of both poles needs to be quicker, so it is possible that the arms do not swing as far as they would on the flat.
- The torso is normally aligned with the pushing ski for the first half of the poling motion (until both hands draw alongside the hips), and then twists to align itself with the gliding ski. What happens if you try the opposite? Might this help when you need to change direction quickly? In either case, it is important to maintain forward momentum by placing the new gliding ski as far forward as possible without reducing the power of the push from the pushing ski.
Notes
Not for the faint-hearted, this technique involves a lot of power when used for climbing hills. However, due to the nature of skiers generally, this technique has become the most-widely used for skating on the flat, especially when travelling at cruising speed. Because of its similarity with two skating, it is often helpful to tackle two skating first (and free skating) to ease the transition to offset skating.
This technique is especially useful when traversing slopes, or skiing along trails that have not been groomed to a level surface. It is also a useful skating technique for turning corners, of both large and small radii. Use the terrain wisely by pushing the gliding ski up into the slope, or around the corner. To understand the effectiveness of this technique, try reversing the pushing/gliding offset and ski the same terrain again. Leading to the 'wrong' side does have its uses from time to time, though, especially when trying to get around a big throng of skiers who are clogging up the track (as in some of the more popular ski races!).
Terminology, skating; can be very confusing to the uninitiated (ie. most skiers!), and never more so than with offset skating. Canadians use the term 'offset skate' synonymously with 'uphill two skate' and yet the Americans claim that these two techniques are quite different. Rather than inflame pan-Pacific rivalries, this author has chosen to avoid the use of any synonymous terminology used in skating.
The use of the words 'pushing arm' and 'hanging arm' may be replaced with terms more obvious to those just learning the technique for the first time. Try the term 'leading arm' for the arm that leads (hangs), and 'lagging arm'/'trailing arm' for the one that sits closer to the chest (pushing arm). It is not always obvious to many skaters that the pushing arm is in fact the one that pushes first. In time, when the war of words between various ethnic groups is settled, common sense will prevail - only the most descriptive and accurate terminology will survive.

One skating
Definition
One skating motion with the feet combined with a double-pole push with the arms. Or alternatively, two double-pole pushes with every two skating motions. Since the arms push with every skate, the tempo is quite fast, and this is therefore suited for sprinting, accelerating, and for more experienced skaters.
Teaching terrain
Long slight slope, firm but not icy snow.
Teaching approaches
- A review of two skating is essential prior to attempting one skating, due to the degree of difficulty that will be encountered at this level of skill. Reinforce in particular the smoothness of two skating, as this is essential for one skating.
- A good introduction to one skating is to firstly give a demonstration of two-skating, but with the odd one skate thrown in, with you calling out which side you are poling on. Tell them to watch how you shorten your poling motion to transfer from the right to the left, and back again. Now make the students two skate as you call 'Right, right, right...' (if they are to pole-push on the right side), until they are comfortable with you calling the shots. Throw in a 'right, ...right, ...right, left! ...left, ...left' to ensure that they can make the transition from one side to the other. From then on, the transition from poling on one and transferring to the other should be instantaneous, and continuous (a form of one skating).
- The direction of the poling action should be along the new gliding ski each time, and the recovery from each pole-pull very fast (pushing hardly gets a look in until the skier builds up to a long glide). The arms rarely have the chance to swing to their full extension out the back until the glide is sufficiently long enough.
- High tempo will achieve the desired result, but only superficially. Students must be able to balance well on the gliding ski prior to attempting to increase tempo. For this reason alone it is important to choose an area that has good gliding potential, or find a slope that is well packed and not too slow to prevent acceleration, nor too fast to maintain control.
Notes
Good skis are imperative for one skating. Terrain choice will compensate to a degree, but slow and non-wax skis will be a liability to those using them, and tire out the skier far faster than a well-waxed ski will.
Techniques: [ overview | basic | classic | basic XCD | inter XCD | freestyle | adv XCD | survival ]
©2013 Ivan Trundle
ivan@itrundle.com.nospam [remove the '.nospam' from address]
[ Contents | Preface | Organisation | Teaching | Techniques | Equipment | Resources | Appendices | Glossary | Index ]