The
Australian
Nordic Ski Instructor
Manual
Ski Techniques
Advanced XCD techniques
Techniques: [ overview | basic | classic | basic XCD | inter XCD | freestyle | adv XCD | survival]
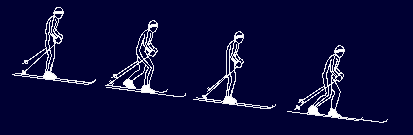
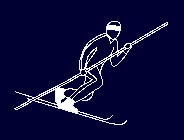
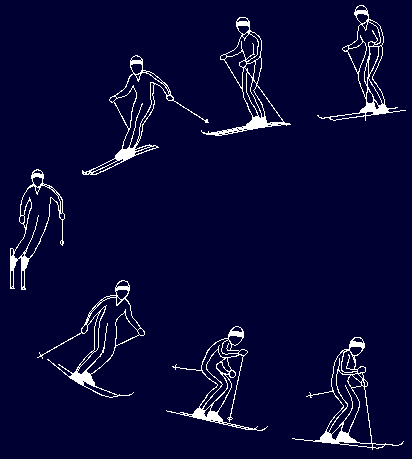
Long-radius telemark turning
Definition
A method of descending moderate slopes with a minimum of effort or strain, by linking a series of telemark turns (turning in a telemark running position), allowing the skis to carve tracks in the snow, with minimal skidding of the skis.
Teaching terrain
Long, moderate slope, preferably on soft snow.
Teaching approaches
- Two distinct approaches are possible when teaching telemarking, either the traditional 'single turn' approach, or the 'direct method'. The single turn relies on the ability of the students to pick up all of the fundamentals of the technique in a 'layered' pattern: working on a simpler aspect of the technique and building up more complex elements into it. Much back-tracking is required when the time comes to add on the skill of moving from one turn to the next. Garlands, or 'uphill' turns (a single turn where the skier finishes by swinging up into the hill to stop) are the most used example of this type of teaching. Whilst this approach is ideal when conditions do not allow full utilisation of a given slope, it ignores the most crucial part of the telemark turning skill - that of linking one turn to another.
- The 'direct method' skilfully avoids this predicament, but is only suitable if the terrain choice has been perfect. An ideal slope is one that has an even gradient throughout, with minimal distractions, and well-packed. If anything, skiers should be forced to speed up initially, and not try to reduce their speed by snowploughing, or veering out of the fall-line, until they become comfortable with the speed generated by staying close to the fall-line. If the slope is too flat, then the skiers will lose their balance and be frustrated by having to wait for events to happen; if the slope is too steep then events will overtake them and they will have little time to perform the skills that bring them toward successful turning. A solution is to use the slope diagonally, and dealing with the inevitable 'one-sidedness' that skiers might develop.
- The garland approach, or teaching this technique via single practise turns, is not recommended unless the terrain allows no other alternative, as it is the linking of turns that is generally harder than any other part of telemarking, unlike in parallel turning. However, the garland method is relatively simple and more familiar to the inexperienced instructor, so little discussion of it will be found here...
- An ability to run in a telemark position is essential. Review the technique to ensure that the students can, and then at a reasonable speed. An ability to balance at speed in this position is desirable.
Lead-change exercise
- Edging, steering, and pressuring of the skis are important concepts here. The simplest way of introducing these concepts is to show how each one works. Edging can be reviewed by returning to downhill traversing, and focussing particularly on knee drive (into the slope first, and then away from the slope, to force the skis onto their downhill, or lower, edges). In practically all snow conditions with this type of turn, edging is more important than steering, which plays a less significant role.
- Steering is achieved by a combination of knee drive and a twisting of the feet into the direction of intended travel. It is most effective when the skis are flat on the snow surface, and in the context of telemark turns, each foot may steering independently of each other, creating a wedge shape between the skis. With long-radius telemark turning, it is best to avoid this if possible (at high speed it spells doom) and encourage less radical direction changes through the fall-line. If too much of a 'snowplough telemark' stance appears, it is difficult to avoid edging the skis on their inside edges, which makes steering more difficult and reduces speed.
- Pressure and edging must be applied to both skis equally, and progressively after they have been steered into the new direction. If the skis are pressured together, then the turning becomes a fluid motion, whilst if the front ski is pressured first, followed by the rear ski (a common occurrence), then the fluidity is lost.
- Throw one ski away and leave the students balancing on one ski , with one foot in the binding. Send them off down a safe slope trying to maintain balance. Once they have warmed up to this slightly off-beat approach, encourage experimentation to see if they feel more comfortable resting the 'free' foot on the front of the single ski, or on the back. What happens if a good deal of pressure is applied to the front of the ski through the 'free' foot? What happens if the 'free' foot is placed very firmly on the rear? Is this a good demonstration of pressure control?
- Go one step further (pardon the pun!) beyond the previous exercise and encourage students to differentiate between mega-pressure on the big toe of the 'tied' foot, and pressure on the little toe. Does this begin to edge the ski? Does it steer the ski? does this exercise make the skier more aware of what role the foot plays in this technique?
- Do the skis leave a skidded arc, or a carved arc? Does it matter? Is it possible to perform long-radius telemark turning without skidding? (Yes, it is, but on all types of Nordic skis?) Is a skidded turn easier than a carved one? Why? Do the type of skis make a difference here?
- As with all turning, focus on the linking of turns together from the beginning - the 'direct method' approach is most successful here, if the terrain is appropriate. This approach also avoids the difficulty encountered when leaving one turn and entering the next, which is often incorrectly thought of as a distinct moment in time, such as when the student says to themselves: 'Hold this one a bit longer... keep going... get ready for a new turn... ready... wait for it!... do it now!
- If the student is having difficulty in sliding the rear ski forward, and insists on stepping it forward (often with a twisting motion, to produce a stem action), this may cause an upset or fall. The rear ski can be kept on the ground, and the skidding reduced, by focussing on the amount of pressure on the rear ski prior to its journey forwards: the more pressure applied, the better, until the rear ski becomes the front one.
- The smooth transition from one complete turn to the other is the most difficult aspect to master, and is often made more difficult by trying to ski too steep a slope, or trying to turn well out of the fall-line and well into it. Choose suitable terrain that is only just fast enough for the slowest-running skis in the class, and encourage constant weaving (think: snake), cycling (rising up slowly and smoothly between each gradual and smooth sink down), or anything that implies constant movement, rather than the usual 'going down into a telemark... (stay there for a while) ...going up into a change of leading ski... (and staying there for a while, too) ...going back down...' technique.
- The pole plant in long radius telemarking is gentle, like patting someone on the head softly, not with enough impact to pierce the skull! An effective pole-plant will leave a fairly long trail in the snow, whereas a 'stab in the skull' will leave a crater and a much shorter trail.
- If all of the rest is sorted out, then the upper body is a good place to work on to make it all happen smoothly. Leaning into the turn (or even out of the turn) isn't necessary for these turns, and nor is rotation of the upper body either into or out of the turn. The upper body has less effect on the direction of turning when moving slowly, especially in longer-radii turning. As the speed builds up, a little upper-body angulation will help here, and is a useful habit to get into when approaching shorter-radii turning.
- Here, the golden rule of facing in the general direction of travel is a good one: when making long-radius turns, the skier is generally travelling firstly across the fall-line, then back through it, and so on, so facing in the direction that the skis are pointing in will work best. As the radii get shorter, the general direction of travel tends more towards the fall-line, with minor deviations (this creates a natural anticipation in long-radii turning, and counter-rotation in short-radii turning). In very short radii turning, the body should face towards the bottom of the slope to conserve energy and balance.
- The height at which a skier should stand when telemarking is often debated, but if the skier is continually moving up and down in rhythm then muscle groups will not fatigue. Maintaining a 'telemark' position is invariably the cause of cramps and falls.
- Different snow conditions suit different heights - telemarking on packed snow (pistes) is far easier to perform when in a more upright condition, as edge-control is greater. Powder skiing (meaning real powder) requires greater fore/aft control, and lateral stability, which is generally easier to maintain when getting into a lower telemark stance throughout.
- In the lower position, however, rear ski control is lost if the rear leg's knee is closer to the ski than the rear leg's shin. Why do you think this happens? Try it standing still and observe how much pressure you can place on the rear ski in this way.
Notes
Stiffer-cambered skis, and particularly those without side-cut, make it more difficult to perform these turns without a good deal of effort, predominantly in either steering or pressuring, and somewhat less in edging. Make sure that you are aware of the characteristics of the skis of your students prior to plunging into a lesson plan. XCD skis with soft cambers will carve more (and steer more easily) than run-of-the-mill Nordic skis (which will skid more and carve only with a good deal of pressure and edging, due to their design which incorporates a stiffer camber than that of good XCD skis).
Note also that telemarking is many things to many people - individual expression of the utmost degree. Be flexible in the manner in which the technique is presented (as with all techniques, but especially so with this art-form), and be prepared to try new things or different approaches to the same problem.
Telemark turning cannot be performed by skiers with poor basic techniques, or poor balance. A good snowplough turn is required as a standby to rescue the accelerating skier (as invariably happens when a long-radius telemark is performed smoothly) who is in danger of running out of control. Make sure that you have plenty of room - and preferably a mechanical method of climbing the hill again, as you will cover a lot of ground with long-radius turning - to allow complete safety and enjoyment.
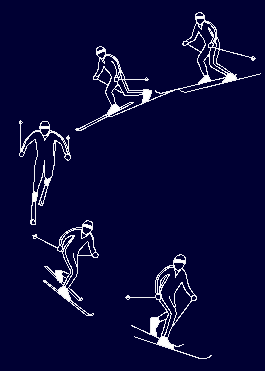
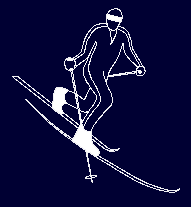
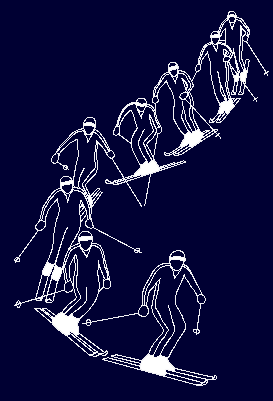
Short-radius telemark turning
Definition
A slower, and more controlled, method of descending by making a series of tightly-linked telemark turns, but with more effort, and some skidding, involved.
Teaching terrain
Moderate to steep slope, initially on softer snow.
Teaching approaches
- If required, repeat the exercise of long-radius telemarks to ensure that all students are capable of running fast and telemarking smoothly. Begin to encourage quicker turning by increasing the tempo of turning (faster music?). In the early stages, the turning may be slight, but the lead change from one ski to the other will be as fast as is required to perform short-radii telemarks. This method is the direct method - yet again. It is very hard to teach short-radii anything without using this method.
- The transition to shorter radii is achieved rather simply by focussing on the amount of steering that is required to change direction. The lead ski into one turn is barely pressured onto the snow to allow it to be steered into the new direction, and then the pressure is applied smoothly along with a degree of big-toe pressure, on the lead ski initially, but on the rear ski as well.
- Does one ski slip and slide all over the place whilst the other is doing its stuff? More pressure on the 'wobbly' ski will instantly cure that little problem. Watch each student carefully, as most are unaware that one ski is in fact more 'wobbly' than the other, especially when in the thick of it all.
- The rotation of the leading foot is instrumental in getting the other ski to follow, but if the leading foot/ski combination has too little pressure on it at the start of each turn, the skier runs the risk of getting tangled when the leading foot/ski comes into contact with the trailing foot/ski. How would you solve the tangling problem? (hint: the answer lies in the preceding paragraphs...)
- Once again, as with all telemarking, the 'lead change' from one foot to the other between turns can be the cause of much grief. Smoothness is the key, along with gradual pressure changes, not radical ones. Radical pressure changes, such as sitting on the rear ski and then suddenly plunging onto the front ski, are good when one wants to perform jump and step telemarks, but those technique descriptions follow. The smoothness comes from skiing on eggshells. If your local ski resort is covered in snow rather than eggshells, then your class will have to make do with imaginary ones.
- Still can't get that smoothness? Go back to telemark running and get the wayward individual to demonstrate a snap change of leading ski and get her/him to rate this a '5'. Now ask for a change that is so gradual that the eye can barely see it and rate this a '1'. From this moment on, ask them to perform a range of changes from 1 to 5, focussing on the smoother end as much as possible until they are able to discern for themselves each level and rate it accurately. Smoothness will follow if the numbering system is integrated in the student's mind.
- The upper body plays a more active (avoid using the trendy and superfluous word 'dynamic') role in this style of turning. The body can help to anticipate the movements of the lower body and counter-rotate to provide a net force acting on the skis in the opposite direction. To demonstrate this effect simply, take a swivel chair with you out onto the snow and stand on it. This will gain the admiration of your class if nothing else, and will captivate their attention. All that remains to be done is for you to twist in either direction and allow the class to see which direction your feet rotate to compensate. Try it and see, and you won't need to read complex explanations of why counter-rotation is such a good thing.
- Jump off the chair and back onto the snow, and if you can avoid the competitive nature of students skiing a slalom course, encourage the class to ski through the set of gates that you have set up for them. Make the slalom course pretty tight, but telemarkable. If they visualise having to rub their backs against each gate/post/ski pole as they zoom past, then the message of counter-rotation is easily put across. Skirting the poles is one method - can you think of any others?
- What can the hands do to help here ? Note the total absence of remarks about poles and pole-plants - save the pole-plant until after all of this and you will have less bother all round. Lifting a large imaginary barrel to the outside of each turn is one way of encouraging counter-rotation and anticipation of the next turn, but is it truly effective? Touching the front knee with the 'inside' hand, too, can achieve the same result. The inside hand is the one on the inside of the turn in question.
- Dropping the outside hand down low enough to touch the calf of the inside (rear) leg will also encourage counter-rotation, and with a side-benefit of introducing effective angulation (try it standing still whilst holding an imaginary telemark pose and see what happens). Without having to explain it in great detail, the skier has dropped the outside shoulder down and pushed both knees into the turn, probably with a bit of pressure on the inside edges of the skis. This is effective angulation, and is of great assistance to the faster telemarker, where centrifugal forces can throw the skier out of balance altogether.
- If the students still need further clarification of the benefits of angulation, pair them up and get them to ski down the slope holding onto a single pole (a slalom pole, because of its extra length, is best) out in front of them, one person at each end of the pole. The radii of the turns should be such that the skier on the outer path of the turn (ie. moving the fastest) is pulling the skier on the inner, shorter radius, turn. The 'inner' skier will experience angulation even if they are unaware of it, as the outer skier will be pulling them outwards: to counteract this, the inner skier must angulate.
- Another example of this is to go 'solo' with the slalom pole. Use it as an outrigger, but make sure that it is dragged in the snow on the outside of each turn to demonstrate the angulation required. If that isn't enough, go and find a mogul field and do the same. The results will astound you!
- Pole placement is getting more and more important as the skier becomes more proficient. Although not entirely essential for the most part, the pole-plant becomes a most important 'trigger' to lead the skier from one turn to the next. Where the pole is put into the snow, and how, makes or breaks good and smooth turns. The way in which the poles are held will determine how they are used: do the palms of the hands (even though wrapped predominantly around each pole!) face forwards in the direction of intended travel, or inwards, facing each other (or worse, the skier) when holding them ready to plant? Why do you think holding them inwards is not as good?
- Still on poles, look at how they are put into the snow: do the pole shafts face straight down, or do they project themselves slightly forward from the skier? Here, the length of the pole is crucial - most Nordic skiers will be using poles that are too long for normal Alpine skiing type of use, and Alpine manuals do not take this into account. To get around the problem, Nordic skiers have often been encouraged to stick on another set of pole grips - minus the strap, of course - half-way down the pole shaft for XCD use, and therefore ruining the balance and lightness of a good set of poles. Unfortunately, the pole is most difficult to use at the lower grip, especially without a strap, and it is totally unnecessary. If the skier feels more comfortable using a pole of near-Alpine pole proportions, it is possible at a pinch to use the existing strap and grip the pole lower down with the thumb alone holding the strap at its normal length. But this, too, is unnecessary...
- By a slight adjustment of technique (or if using skating poles, a monstrous adjustment of technique!), it is possible to use normal Nordic poles effectively and efficiently. This is achieved by merely holding the poles with the palms of the hands facing forwards rather than inwards, and twisting the wrist to push the pole tip further forward - or much further forward if using the previously-mentioned skating poles. All pole plants should be made at least 10 centimetres further forward than normal, but is obviously dependant upon the length of Nordic pole used.
- The placement of each pole will determine how the skier moves from one turn to the next. The trigger can be short and sharp (if turning quickly), or smooth and even (turning less-quickly). In both instances, the point at which it hits the ground is important. Try this stationary demonstration: place the right pole's tip next to your right foot whilst standing in a right-foot-forward telemarkish sort of position. Leave the pole-tip firmly embedded in the snow (if you have just tried this indoors, the carpet will suffer), and push your right hand around a bit, discovering the range of positions that it can be placed in. In many ways, the hand acts like a combination brake/accelerator control for each turn. Pulling it back and in to the body will achieve the opposite effect of pushing it well forward and out. Which hand/pole movement will make each turn smoother and easier?
- As the speed builds up (when turning rapidly and down a steep slope), the hands and pole placement not only assist in keeping the skier on top of the skis, but also leads the skier from one turn to the next (that should answer the previous question!). On very steep slopes, the pole-tip placement can get fairly wild, but see if you can discern a difference when placing it extremely close to the foot, or well away. Don't forget that longer poles mean that the pole will have to be placed further away from the foot and towards the front of the ski.
- Cannot get the students to face down the slope? Make them focus on an object at the bottom, or get them to count your fingers (whilst you stand at the bottom) out loud as you hold them up in front of you. This should solve the common problem of students over-rotating and causing themselves to turn back up into the hill whilst trying to link turns together.
- If this does not work, pair up equally-fast skiers and get them to mimic each other down the slope, with the leader dictating the follower's moves. The follower must focus on the leader from start to finish, and copy every turn.
Notes
Short-radius turning requires supreme dexterity and good balance to perform well. In the above teaching notes, little emphasis is placed on whether the skis should be skidded or not, simply because short-radius telemarks performed with a healthy amount of skidding are near-enough to jump or step telemarks. These are discussed in greater detail elsewhere in this manual.
The essential ingredient in these turns is smoothness, which only comes from avoiding massive and sudden pressure-changes from one ski to the other. Each ski should have contact with the ground at all times, if only to remain in the control of the skier standing on top of them. Exercises to encourage this aspect alone are worthy of a great deal of attention (see also long-radius telemarking).
Students often query the amount of pressure to be applied on either foot before, during, and after the turn itself, and there are as many answers as there are instructors!
As a general rule, more pressure is applied to the front foot before the turn is begun, to allow the front ski to begin steering in the direction desired. More and more pressure is then applied (from the moment the turn begins) to the rear foot to ensure that it follows smoothly, and as the skier comes out of the fall-line and prepares for a lead-change to turn in the opposite direction, pressure is relaxed slightly off the rear foot to allow it to slide forwards and become the front foot. As the feet draw parallel to each other, more pressure is to be found on the new front foot, at which point the whole cycle is begun again.
Skiers performing long-radius telemarks may not experience the same pressure changes as those performing shorter-radii turns, and it is entirely possible to place one's mass over the rear ski for most of the time, applying a little pressure to the front ski when conditions dictate.
In long-radii turns, if the centre of the skier's mass is as close to the mid-point of the skis, pressure on one ski over another is far less important, and depends more on the physique of the skier (big, strong thighs allow the skier to sit more on the rear ski). In the privacy of your own lounge room, stand still in a telemark stance for ten minutes to discover whether your thighs are strong enough!
The choice of the type of telemarking used on any given slope should be explained to all students. Long-radius turns of any style are always very fast, and vulnerable to terrain 'upsets' of all kinds. But they are effortless and fun, and useful for covering a lot of ground comfortably fast. They also suit the 'cruisey' mood of many skiers. However, long-radius telemarking is a lethal weapon in the hands of the inexperienced, or on crowded Alpine pistes. Short-radius turning is most suitable to check excessive speed, and helps other skiers, especially Alpine skiers (who rarely ski long-radius turns of any description), to predict your movements. It also allows for a greater choice of manœuvres whilst moving down a slope, as the skier is less committed to a particular line. This is a desirable choice in rough or unpredictable terrain, or when skiing amongst others.
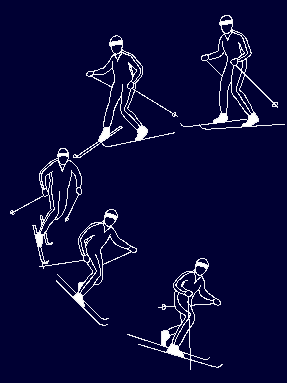
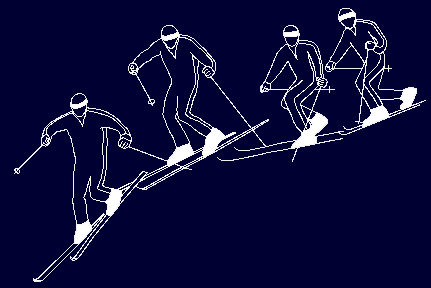
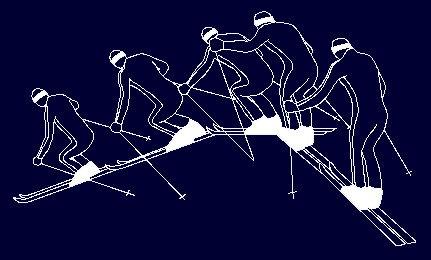
Jump & step-telemark turning
Definition
A method of descending the steepest and most difficult of slopes by making a series of tightly-linked telemark turns, involving aggressive unweighting of skis to turn them quickly - usually more in the air than on the snow.
Teaching terrain
Moderate to steep narrow slope, initially on softer snow, but moving to crud.
Teaching approaches
- A review of long and short radii telemarks will refresh memories, although by focussing on short-radius telemarking the lesson can flow on to the jump and step telemarks (in essence very-short-radius telemarks). The following is a 'direct method' approach...
- Leave the skis behind and concentrate on the poles and pole-planting. Whilst standing still, but holding poles normally, plant both poles heavily (ie. permanently!) and jump into the air, landing with the feet in an imaginary telemark position. Follow this by jumping again and switch the lead foot. The skill just performed is the fundamental of both jump and step telemarking, only the timing and the foot placement alters. More technical manuals will describe the motion of sinking down (flexion) and jumping up (extension) in great detail, stressing the importance of it. Using simple related exercises provide adequate demonstrations of the technique involved without unnecessary verbage - jumping over poles is a good example of this 'short-circuit' method, demonstrating the massive unweighting required to make it work.
- To progress a bit further down the line, encourage jumping and twisting so that when the front foot hits the ground, it does so angling more and more towards the opposite ski pole, with the whole torso following, therefore placing the rear leg and foot in line with the front leg/foot combination, but closer to the other ski pole. Repeat this a number of times and you will see that a fair amount of twisting must take place if the torso is to move through up to 180°. The poles are used for jumping assistance, and do not leave the ground unless absolutely necessary, for the sake of this exercise.
- The timing of the feet landings is relatively unimportant at this stage, but once the skis are re-introduced, timing is critical. As a warm-up to this, practise landing firstly on the front foot (yell 'tele!') and then landing shortly afterwards on the rear foot (yell 'mark!'). The timing can easily be altered by using multi-syllabic words, or phrases, to replace the 'tele' and 'mark'. The ultimate aim is to ensure that the front foot lands first, especially when the skis are put back on. Why is this important? Try landing on the back foot/ski first and judge for yourself. This 'two-step' motion of the feet is often referred to by those who enjoy confusing the world with jargon as 'non-simultaneous motion', or 'sequential stepping' (is it really possible to step any other way?)...
- With the skis in place, the whole process of jumping from one direction to another is tiring, so get straight into moving down through the fall-line. Find a suitably-steep slope, as gradual slopes are actually more difficult to perform these manœuvres on, especially when linking them together. The double-pole plant between each jump is a liability however, so ensure that the poling action is dispensed with after initial attempts on the slope itself. Use the edges to prevent the skis from sliding.
- A single pole-plant is more fluid for these telemarks, and the placement of the pole tip and the positioning of the hand determine how far a skier can turn, and how much balance can be maintained. The body must anticipate the next turn (rotate around in towards it) to enable the downhill pole to be planted prior to the start of the jump/step. The timing can be regulated by altering the mnemonic used earlier from 'tele' and 'mark' to 'oom!' and 'pah!' and 'par!'. Say it a few times and a trombone couldn't do it better. The 'oom!' coincides with the pole plant and the sinking down ready to jump, the 'pah!' follows the jump and twist and the rear foot moving forward and becoming the front ski and landing on the snow, whilst the 'par!' comes when the remaining (rear) ski hits the snow-surface.
- The non-pole-planting hand is often neglected in this technique. It is important to make sure that it keeps up with the rest of the body : it should be in front leading the torso. This helps to get the body to face down the slope, and to maintain balance and ensure that skis are pressured and edged.
- Losing balance when jumping or stepping? Pair up and throw all except one pole away, or better still, use slalom poles - one pole per pair of skiers. Use the pole as a balancing rod as the two skiers jump/step down the hill. Each skier holds onto the pole with both hands (that will help to keep them forward) and both skiers jump or step in time with each other. Balancing effort is halved.
Notes
Step-telemarking normally refers to any turn that involves one foot hitting the ground shortly before the other, whereas jump-telemarking involves both skis hitting the ground at precisely the same time. The 'take-off' into the jump or step can be similarly described.
Step-telemarking involves any amount of wedging, or stemming, of the ski to assist in getting through the fall-line with the minimum of fuss. Jump-telemarking involves launching the skis into the air and bringing them down into the new direction as quickly as possible, and with the aim of landing with minimal skidding, slipping, or carving. It is often desirable to merely land in one spot and not move any further (with a strong edge-set) - at least until the next jump is ready to be performed. This form of skiing is extremely strenuous, even for fit and competent skiers, and really only suitable for skiing mogul fields, steep slopes (30° and beyond), or in a confined gully, or couloir.
Long-radius and step-parallel turning
Definition
A method of descending moderate to steep slopes with a minimum of effort or strain, either at high speed using stiff-cambered skis, or at slower speed using softer-cambered skis.
Teaching terrain
Long, moderate slope, on preferably firm snow.
Teaching approaches
- Experienced stem-turning skiers will need little introduction to long-radius turning, but will require help in learning to control pressure application to each ski, and commitment to turning (both of these factors are applied differently in parallel turning).
- On a long, even slope, descend directly and review step turning - briefly. To add a bit of variety, practise stepping the skis parallel to each other, and as far as one can comfortably step sideways. Gradually build up the tempo until the stepping becomes a fast 'cha-cha', rather than a 'plop...plop'.
- Having completed the previous exercise, return to a flat area and repeat the same exercise, demonstrating that if the stepping is fast, angulation of the skier takes place, and edging of the skis also. It is this edging and angulation that will cause the skis to carve, if enough pressure is applied. Emphasise springing up between each step across, and sinking deeply at the culmination of each step.
- The ability to sink down and spring up is important (unweighting the skis), but especially so is the ability to drive the knees downwards and inwards as the sinking takes place. Focus on the amount of pressure that can be applied through each foot, especially the 'outside' foot of each step across. This is instrumental in progressing back onto the slope again.
- Back onto the slope again, repeat the previous exercises. Ensure that the tempo is reasonably fast, and that the skier does not deviate too far from the fall-line if possible. Pressure build-up should be smooth and continuous. Using a scale of 1 (little pressure) to 5 (maximum), encourage the skier to go from 1 to 5 in smooth steps onto the outside foot of each step. Once the outside foot hits the snow, the pressure should be applied instantly, building up to maximum pressure as the inside foot (softly) hits the snow also. Pause slightly and allow the pressure to remain on the outside foot (and practically none on the inside foot), dropping the knees inwards, forwards, and downwards. The skis will turn, slightly at first, and increasing until the skier must make another step onto the other foot, repeating the cycle.
- For those with good balance but an inability to turn smoothly, try this: whilst applying pressure onto the outside foot, lift the inside foot and ski entirely off the snow and point the toe of this foot out away from the turn as much as possible (cross the skis over the front). With skill it is possible to place the lifted ski perpendicular to the ski left on the snow. Try it first standing still and it is easy to see what benefit this exercise might have, even if only partly successful.
- Watch for the infamous wedge that will appear when the skier is too keen to get into the next turn, and, rather than stepping out parallel, steps out in a wedge (stems) to assist the skier in getting into the fall-line. Whilst there is nothing wrong with stemming, it is an indication of a skier's impatience to get into the next turn, which is often a result of too little speed. If this is the case, increase the slope(!), or encourage skiing closer to the fall-line and turning less. Hint: pressure must be applied early to the about-to-be outside foot, almost straight after coming out of the fall-line (when it is still the inside foot).
- The poles can come into play at this stage, and are used as a trigger to move from one turn to the next. Return to the stationary 'cha-cha' exercise but this time with poles, placing the inside pole into the snow and reaching forward to obtain compression of the torso and legs just prior to the first 'cha', and removing it (most important) immediately after the final 'cha'. The end-result is a 'plop-cha-cha-gloip', repeated over and over again... The 'gloip' is the removal of the pole from the snow, but in the early stages it is beneficial to let the pole drag until the skier comes out of the fall-line and is ready to 'plop' again.
- Little else needs to be done with the pole-plant, and it is often necessary to reassert the sinking and extending motion required of the body (poles invariably lock the torso up), emphasising the need to stand tall, and sink small. The extremes of up and down movement can be gradually reduced as the skier moves faster and with more confidence down the slope.
- Hip rotation is a prime consideration at this point, especially for those students who telemark well. For these poor individuals the hips will invariably be pointing the 'wrong' way - in towards the turn, rather than out from it. Encourage students to lead with the inside ski for as much as they feel comfortable, and their hips also (counter-rotation). This pre-rotation of the torso assists in gaining a more effective angulation of the body, and thus allows the skier to place more pressure on the outside ski.
- The extremes of stepping laterally can also be reduced until the skier merely flexes the legs and drives the knees inwards whilst applying pressure onto the outside ski. True long-radius parallels will form.
- Fine-tuning of this technique, and venturing onto steeper slopes, will lead to skate-parallels and scissor-parallels, and needs little explanation here, as they are simple progressions on from basic step parallels. Where do you think they might be useful? Is one more useful than another? Hint: skiing gates (slalom) will naturally bring out one technique over another - what does this suggest?
Notes
A more powerful variation of this technique is that of step-parallel turning, performed by stepping the ski out laterally (lateral projection), or by skating out from one ski, either skating the outside ski to gain speed and angulation (skate-parallels), or by skating the inside ski to approach the fall-line at a finer angle (scissor-parallels). Skiing with the feet further apart than the traditional 'knees-bolted-together' stance is a more contemporary interpretation of parallel turning (and is more stable), and in an extreme form has been referred to as 'open turning' in other skiing manuals.
Two things are a prerequisite for this style of turning: a steep slope, and half-decent XCD skis. If the slope is not steep enough, speed will be insufficient and the skier will not be able to exert enough pressure onto each ski to push out the camber (turn it inside-out), unless s/he is strong and/or heavy. XCD skis, with a reasonable side-cut, and softer-cambered, are practically essential to perform long-radii parallel turning - without them there is the very real risk that the skis will not carve and turn at all, or worse, carve and turn the opposite direction, even with 'correct' edging and steering. All boat-shaped skis of stiff camber will suffer from this fate unless a tremendous amount of pressure is exerted upon them to turn the camber inside-out - and this is writing from personal experience!
Short-radius parallel turning
Definition
A slower, and more controlled, method of descending by making a series of tightly-linked parallel turns, but with more effort (and more skidding of the skis) involved.
Teaching terrain
Moderate to steep slope, initially on firmer snow.
Teaching approaches
- Review longer-radii turning, and the exercises shown above. Gradually increase the tempo and the twisting (turning) force exerted on the skis to produce tighter turns. Pole-planting is still not required at this stage. Move the focus onto pressure change from foot to foot.
- A completely different approach is to be found in developing the snowplough and encouraging a progression on from this more basic technique. Move quickly through hi-tempo snowplough turning to hi-tempo stem turning, thus introducing a pole-plant checking motion. The transition to short-radius parallels is relatively painless, although moving away from a stemming action requires steeper and steeper slopes.
- Body positioning is as for all other high-tempo and short-radius manœuvres - focus on a distant object at the bottom of the slope and maintain a constant as possible torso direction, whilst the feet do the dancing underneath.
- The pole plant becomes the driving force behind each turn, and the timing and placement is most important. See the relevant discussion of pole lengths and problems related to it in the telemarking techniques section - pole placement and timing are practically identical, as are many of the exercises to develop good timing.
- Look at students from the bottom of the slope, particularly at the angle of each of their pole-plants. From the bottom of the slope looking upwards, each pole should appear to be driven inwards towards the skiers foot (ie. the skier's arms are extended outwards, almost crucifix-style, yet the pole tip is being placed perilously close to the skier's feet). This helps to draw the skier onto each pole, and down the fall-line.
- If you (or they) are unsure of the effect of this, try emulating the exact opposite, and placing the hands close to the body whilst planting the pole-tip as far away from the feet as is possible. Which is better?
- The reach forward for the pole-plant is the key to maintaining balance and having a powerful and smooth turn - encourage a strong compression of the legs (with crouching to match) as the pole is extended out in front, followed by a strong extension of the body as the skier skis past the pole tip planted in the snow.
- The hands should always be visible in front of the skier to maintain balance - ask each skier to hold a snowball on top of each pole grip and parallel as much as possible to the bottom of a long slope, balancing the snowballs all the way. If they drop them, they will lose their balance, too. Look for a smooth pole-plant at every turn, and ask them to count the number of pole-plants they make. This will do wonders for those who insist on taking out all of their aggression with their pole-planting.
Notes
Short-swing parallel turning, or 'short-swings' as they are known in Alpine circles, are not covered here, They are quite possible on XCD skis, although the lack of a heel locked to the rear of the ski creates a liability when skiing steep and difficult terrain (the best place to practice short-swinging). Jump-parallel turning is also possible, but is covered in the section on jump-telemark turning described earlier - just alter the positioning of the rear foot to make it the front foot, and you have it in a nutshell.
Short-radius parallel turning is the ultimate XCD experience in good snow conditions, but is at best difficult to perform using inadequate equipment, especially sloppy boots (the most common problem). Check the type of gear that each student is using, and compare that with the student's skiing proficiency (known or unknown!). Expert skiers will have the ability to cope with the worst equipment available, but there is no need to burden the rest of the class if it is at all possible to suggest that better equipment might help them along a little bit - a suggestion you should make after the class is over, and not before!
Many of the exercises to be found to improve a student's ability to parallel turn are borrowed directly from Alpine Instructor manuals, and simply won't work with the majority of Nordic skis on the market today - even many so-called 'XCD' Nordic skis. Alpine skis, bindings, boots, and poles all have one objective: to make the skier perform parallel turns comfortably and easily. Nordic ski equipment has many objectives, one of which might be to allow a skier to perform parallel turns.
Techniques: [ overview | basic | classic | basic XCD | inter XCD | freestyle | adv XCD | survival ]
©2013 Ivan Trundle
ivan@itrundle.com.nospam [remove the '.nospam' from address]
[ Contents | Preface | Organisation | Teaching | Techniques | Equipment | Resources | Appendices | Glossary | Index ]