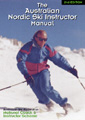
The
Australian
Nordic Ski Instructor
Manual
Ski Techniques
Intermediate XCD techniques
Techniques: [ overview | basic | classic | basic XCD | inter XCD | freestyle | adv XCD | survival]
Downhill traversing
Definition To descend a slope diagonally, thus reducing the rate of descent, by setting the skis parallel and across the fall-line at the desired angle of descent.
Teaching terrain
Initially, light to moderate downhill, on soft snow, with flat run-out.
Teaching approaches
- The type and depth of snow and the angle of the slope make a substantial difference to the way in which one traverses. If the snow is soft and deep, little or no edging of the skis will be required. If the snow is steep and icy, then a very precise control of the edges is called for.
- A sensation of edge control, and also body positioning can be achieved whilst stationary, by standing parallel to the student, holding the student's hands and pulling against them. This replicates the forces acting on the skier during a traverse run. By maintaining this pull, it is possible to experiment with feet positioning, leg flex, hip rotation, and body positioning.
- Focus in on the feet, and feel where the pressure is exerted. Is it the lower side of the foot, or the ball of the foot, or the heels? What happens when the edges are released? What happens when the legs are flexed - or straightened? Can you edge more effectively by pushing the knees towards or away from the force acting against you? What does your body have to do to compensate for the pushing of the knees away from the body axis?
- Why do we push one ski in front of the other? Firstly, see what happens when we keep our feet together - see what happens to your edge control. Then look to the hips and the upper body. Is it easier to maintain balance with the feet together? Try rotating the hips into different positions and decide which is best.
- What about pressure on the feet? Dogma tells us that we should put our mass onto the lower ski. Is this always true? What if it is reversed and pressure put onto the uphill ski? Try all of this out on many different slopes and different snow types. You will be surprised to find that your traverse 'position' might alter dramatically - especially if (for example) you are preparing to make a downhill telemark turn.
- After all of this exploratory work, try stepping the skis parallel up and down the slope whilst actually downhill traversing. What role do the hands play?
- To understand more fully the force acting on the skier, find a short, safe, steep and icy slope and sidestep up part of the way - look at the body position required to maintain a position on this slope: this is the ideal position to hold when traversing on steep and icy slopes, and to a lesser degree on flatter slopes.
Notes
This technique is often dogmatically portrayed - especially the position one must assume to perform it 'correctly'. If one were to 'assume the position' in every downhill traverse, not only would the skier tire quickly, but would also be prone to falling over due to extreme tension. A degree of all of the key factors of extreme traversing can be found in any downhill traverse. The application of these is variable, and allows the skier to maintain a dynamic balance over different terrain.
The type of slope should be varied as much as possible, but at the same time the skier should be able to run to a complete stop at the end of the traverse if at all possible. Soft or deep snow will not easily draw attention to the predominant factors involved in traversing - begin on soft or deep snow, but move onto more challenging terrain as soon as possible. Any slightly concave slope should assist here - a convex slope will focus the attention on stopping at the end of the exercise, rather than traversing position itself.
Stem turning
Definition
To descend moderate slopes by traversing and then stemming the uphill ski outward and applying pressure onto that ski until the skis face in the new direction, at which point a traverse is resumed until the next desired change of direction.
Teaching terrain
Moderate downhill, on soft to firm snow.
Teaching approaches
- Review traversing technique to ensure that all is in order. During the review, introduce uphill ski movement by sliding or lifting it out into a convergent position with the other ski, and then sliding or lifting it back. If the snow is firm (as on a prepared piste), sliding the ski will encourage a smoother leg action, although it is entirely possible to lift the ski out (what will this encourage?) in deeper or difficult snow.
- The fan method (garlands, and swing to the hill) of beginning in the fall-line, and stemming the ski out and then weighting it and skiing out of the fall-line, works well here. Focus on weighting of the stemmed ski initially, and then on to bringing the other ski parallel when facing the new direction.
- Weight-shift from one ski to the other is important. Once the outside ski of the turn is in place, the body mass should be moved over it to allow the other (inside) ski to come alongside. It may have to be forcibly moved toward the outer ski, either by sliding or lifting. Which is preferable, and why?
- Shouting 'traverse-stem-traverse-stem-traverse...' to the students will encourage them to get their timing improved. Few novice 'stem-turners' understand that they must wait until the skis cross the fall-line before they can move back to the traverse element, nor do they understand the rhythmical nature of the exercise.
- Emphasise moving the inside foot slightly forward of the outside foot as it is brought parallel to assist in keeping the weight on the outside ski during the turn - letting the inside foot fall behind the outside foot will produce a telemark!
- The next stage is to encourage a positive weight-shift with an 'unweighting' of the skis to assist in turning them. Using the 'traverse-stem-traverse' idea, change the terminology used to 'down-up-down' to focus on body movement. As the skier rises from a low position, it is easier to stem the outside ski, and as the skier sinks back down again (with some knee drive into the slope), the skis can skid across the snow and begin to find an edge again.
- The pole-plant is best avoided until the foot-work is well sorted out. As most students have little concept of where to place the pole-plant, and its function in relation to the turn, save it until the basics have been mastered.
- Rather than using the pole as a point to rotate around (and thus over-rotate at the end of the turn), begin to work on using it as a trigger to time the upward motion of the skier. The pole-plant in this turn is not energetic, nor should the pole-plant be seen as the best method of getting the skis through the fall-line. Otherwise the skier will never be able to turn in difficult snow conditions, since the pole-plant will not always provide the usual support expected by the on-piste skier.
Notes
This turn differs from snowplough turning in a significant manner - the skis are not constantly maintained in a convergent ski position throughout the turning. This enables more of a carved turn, but more importantly allows the skier to avoid skiing in a fixed position, thus flexing more leg-muscle groups.
A slight variation of the stem turn is used by professional mountain guides when they encounter difficult snow whilst on Alpine skis - it is by far the safest and most stable turning movement on any skis.
The 'correct method' of performing the completion of each turn is often debated by idle instructors. If the skis skid until the skier is left facing back up the slope, then the turn has been successful, but the linking of one with another has not. There comes a time in every turn of this type when the skis are drawn parallel and carving takes place.
Inexperienced skiers will skid throughout the turn until they build up courage for a new turn. For experienced skiers the skis will come together and carve as soon as the skier begins to leave the fall-line (traversing begins). Expert skiers will begin to bring their skis together before they hit the fall-line, and carve or slip right through it and beyond, rarely allowing the skis to be in a stemmed position.
Parallels are only a short step away (pun intended!).
Side-slipping
Definition
A method of controlled descent on steeper slopes by maintaining skis in a parallel position, and allowing the skis to flatten out onto the snow, and slide down the slope, either along the fall-line (side-slipping), or at an angle to the fall-line (diagonal side-slipping).
Teaching terrain
Moderate to steep downhill with safe run-out, on firm snow.
Teaching approaches
- If at all possible, begin by reviewing downhill traversing, and introduce students to steering their skis with their knees back up into the slope. If the skis are allowed to flatten out against the snow slightly, then they will skid or slip. Going from the known (traversing) to the unknown (diagonal side-slipping) in this fashion is considerably easier than attempting to teach sideslipping directly.
- The action of getting into a slipping motion can be enhanced by encouraging a dropping of the hips as the skis begin to slide (unweighting), and learning to control the rate of sideways movement by driving the knees forwards and up the slope to slow and stop, or driving the knees down the slope to speed up.
- What happens when pressure is placed on the heels of the feet when slipping? What happens when pressure is placed on the toes? (These should alter the direction of the slide from forwards to backwards.) Which foot has more pressure overall? What happens if you lean up into the slope, rather than drive the knees up (leaving the upper body above the skis)?
- Imagine (close your eyes and try this one) standing on your skis and picking up a very large wooden barrel, and then trying to pass it to someone standing just below you on the slope. What happens if you try to pass it to someone who is not only below you on that slope, but also standing a metre or so further in front of you?
- To get the skis to slide backwards (backwards diagonal sideslipping), hold the very same imaginary barrel and attempt again to pass it to someone just below you (and a little behind you too), and imagine that you have to open a door first to get to your accomplice. Naturally, the only way you can open the door is to push it open with your shoulder. See what happens?
- Chariot races (or 'piste-basher emulation') are the order of the day in ideal conditions. Pair up students, with one acting as the horse/engine, and the other acting as the chariot/smoothing blade. If it is not particularly steep, you may need to employ more than one horse/engine per chariot/smoothing blade. The horses/engines face down the slope, holding onto the chariot's/blade's poles. They (the horses/engines) are held in place on the slope by the chariot/blade, who is positioned across the slope and hanging onto his/her poles for dear life. On the command 'Go!', each team is to descend the slope as quickly as possible and arrive unscathed exactly on a designated finish line half-way down the slope. This all sounds incredibly easy until you stipulate that the horse/engines are not allowed to either propel or retard the chariot/blade. They must neither skate nor snowplough, remaining fixed in position, hoping that the chariot/blade has the capacity to control his/her rate of descent accurately by sideslipping. Needless to say, a short, steep (but safe) slope is better than a long flattish one.
Notes
A minor pitfall here can be the use of non-wax skis. Sideslipping, and diagonal sideslipping is far easier with skis with a smooth base. Be wary of teaching sideslipping to non-wax skiers on anything but perfect (ie. very icy) conditions for dangerous activities. Sideslipping is not an end to itself - it is an important fundamental component of parallel turning, and students must be able to sideslip competently prior to attempting parallel turning.
Telemark running
Definition
A method of descending rough, unpredictable terrain, in a straight line, by maintaining a flexible telemark stance - in which one foot is pushed out in front of the other, leaving the rear knee lower than the front knee.
Teaching terrain
Light to moderate downhill, on variable snow, with flat run-out, in or out of tracks.
Teaching approaches
- Leaving the poles until later, stride out with one foot about a boot length, pushing the hip forward to put more mass onto the front ski, then try to lift the tip of the back ski off the snow.
- Try the same exercise again, but this time pulling the hips in to pressure the back ski, and then try to lift the front ski off the snow. If at first unsuccessful, try bringing the feet closer together (fore and aft). Try it again with the feet further apart (fore and aft). What does this tell you about your ability to move your body mass forwards and backwards to balance when descending a slope?
- What is the most useful place to put the arms? Carrying a waiter's drinks tray is extremely useful! How much does the position of the arms help to maintain balance? As one gains confidence and speed, try extending the arms out further - forwards (good?), sideways (good or bad?), and even backwards (bad?).
- Where should your body mass be when about to ride a bump? Where does it go as you rise out of a dip? What happens in a series of bumps and dips - do the skis move further apart to straddle the irregularities, or close up together? What works best? Try some bicycle bumps.
Notes
This is a fairly static technique, in that once in a telemark-running position, there is little else to do (so it would seem at first) except maintain one's balance with arms and legs. Since this technique is most often used to absorb bumps and rough terrain with comparative ease, the skier's legs will flex a good deal. One should be able to feel which foot has more pressure on it, and thus be in a position to move from one to the other without conscious effort. Concentrate on the feelings in the feet!
Techniques: [ overview | basic | classic | basic XCD | inter XCD | freestyle | adv XCD | survival ]
©2013 Ivan Trundle
ivan@itrundle.com.nospam [remove the '.nospam' from address]
[ Contents | Preface | Organisation | Teaching | Techniques | Equipment | Resources | Appendices | Glossary | Index ]